Monday, November 18, 2013

Steamy Apple Cider

Fall's bounty, with or without the rum.

Okay, so you spent the morning complaining about the end of summer and the afternoon raking leaves. After a long walk with the dog, wearing your favorite sweater, you reward yourself with a warm, golden nectar that fills your kitchen with the soothing aroma of fall. Add allspice, cloves, nutmeg and a cinnamon stick. Better still, add a splash of rum, whiskey or Port. You've come home to the magic of hot apple cider and you're almost ready to face the holiday season.

Make it quickly and easily...

Thursday, October 24, 2013

When was the last time you made whoopie...

It sounds like a question from a bad game show, but when was the last time you made whoopie... pie?

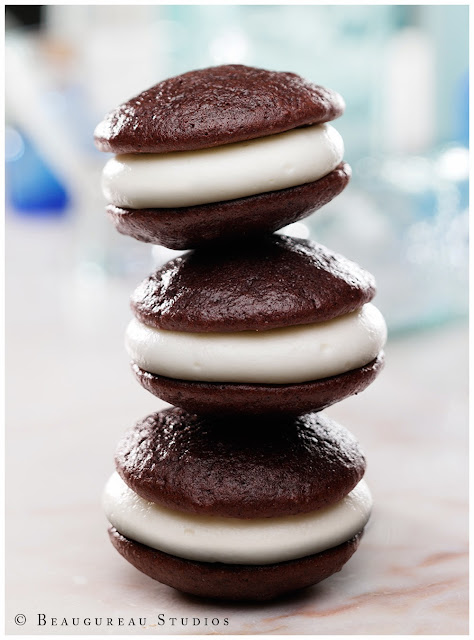
Home-baked Whoopie Pies are an American tradition.

This was an obviously fun shoot.  Bad jokes and puns were flying across the studio.  But while we were having fun, we also had a somewhat difficult subject.  The combination of very dark chocolate pastry sandwiching a very white filling created a challenge.  The contrast between the two had to be brought closer together.  We firmly believe that being able to do a project like this 'in camera' is an art form. The term, 'in camera' dates back, and people may not know what we mean.  Doing a shot 'in camera' means no Photoshop!

We do have a practical side as well.  Technology is progressing, with the intent of making our lives easier.  Photoshop allows us to do some amazing things and saves us a lot of time. So we mixed the art form of shooting 'in camera' and the technology of Photoshop to help us finish this shot.

We used a soft light source from above. This gave us a starting point to control the contrast.  We then brought in a point light source, from directly behind the subject, to produce the highlights on the chocolate pastry.  This light was just blowing out the cream filling.  So we took a separate photo with the same light dialed down, so the filling was properly exposed.  The two photos were later merged in Photoshop

We also used a white card to reflect some of the point light source (from the rear) back onto the front of the shot.
 
Okay, so the story goes that as far back as the 1930s, Whoopie Pies, also known as ‘gobs,’ were made in New England, and when farmers or their kids found them in their lunch boxes, they yelled “Whoopie!” Supposedly, they were made with leftover cake batter, but who ever heard of leftover cake batter?

The real Whoopie Pie is a delicious dessert sandwich, about the size of a hamburger, made with two soft cookies and a cream filling. Today, if you want to make one, it’s just a matter of combining ready-made ingredients and baking. Or use your preferred chocolate cake recipe.

Easy Peasy Whoopie Pie Recipe


Monday, October 21, 2013

Granola and breakfast...

Some people think they don't have time for breakfast. That's because they're over-thinking it. Breakfast just doesn't have to be complicated. 

Granola clusters mixed with dried berries, shaved almonds and topped with honey.
Granola is a very easy, quick and nourishing early morning treat, and lighting this shot was just as simple. We wanted to give it the look of morning. To do so, we started with a very large light source to emulate window light. We put this light in the back of our shot, to the right. This gave the set up a beautiful natural light look, but natural light often needs a fill, so we brought in a white card at the front left to fill in the contrast. We needed to add some ‘action’ to the shot, so we added a point light source, from the back left, to add some spectacular highlights. To finish, we used a hand-held mirror to fill in at the front of the granola, just a bit more than the white card did.

With all the types of granola on the market today, you'd think you could find one that contained all of your favorite grains, nuts and fruit and nothing more. Don’t despair –you actually can make it yourself, with a minimum amount of time and trouble.

Granola contains rolled or flaked grains, like old-fashioned oats, raw nuts (chopped), honey (brown sugar or your favorite sweetener), your oil of choice, and salt. Seeds (like sunflower or pumpkin), dried fruit (don’t bake the fruit), unsweetened coconut, spices, cocoa – even an egg white – are all fine, but optional.

Here’s the concept: combine, spread out on cookie sheet, bake, add dried fruit and eat. Cool and store the remainder in an air-tight jar or even Tupperware. Nothing fussy.

Easy, Customizable Granola Recipe

Tuesday, October 8, 2013

Remote Art Direction...

We have a lot of clients from around the country who can't always attend a shoot.  To help bridge the gap we do remote art direction.


Our studio was built with productivity in mind.  Not only for us, but for the clients who come to work with us.  The studio has to be an office away from their office in every aspect.  We often have clients tell us that they get more work done at our studio than at their own office.

Sometimes, work is so demanding, that they can't slip away or the art director can't make the trip to Chicago.  So, we utilize Remote Art Direction via Skype.  Skype allows us to connect with our clients as if they were here.  They can share our screen and see changes being made in real time with our food stylist.  They can see live feed through our camera and give real art direction before a shot is even taken.  We can also invite multiple people to view what's going on, because not everyone can be expected to huddle around one computer in the office, or be in the same location.  This way we can reach everyone who needs to be involved in the comfort of whereever they happen to be.

We always enjoy having people come to the studio, but when they can't... this is a great way to get the job done.

Wednesday, September 25, 2013

Rib Tip Ragout...

As the weather starts to cool off and fall begins, comfort food sounds really good. Nothing warms you up more than a thick, hearty soup or sauce. Our shot features a special mocha sauce with meaty rib tips - great with crusty bread and a fine Oktoberfest beverage.


Rib tips marinated and cooked in mocha sauce.

We wanted to present comfort food in all its glory. Our client requested a shot from above to capture the meat as it cooked. The challenge was to project light into a deep pot that would normally tend to absorb light. So to start, we brought in a very large, soft light source from the left. This light allowed us to capture a lot of highlights on the meat, and started to give the pot itself some definition. The light was very directional from the left, so we needed to fill in on the right side. To accomplish that, we brought in another large soft light source from the back right. This light helped to control the contrast on the pot and the surface or background.

Our shot started to have a breath of life, but the hero (the stew) still appeared flat/dead. When shooting sauce, it’s practically a mirror that reflects the light source back, so the light source had to be broad. But if we put a box above, it would tend to look very flat, so we needed to get some fall-off. To do this, we hung a 4x8 white card directly on top of the camera (since we were shooting straight down). We then took a point source of light and aimed it at the card. This allowed us to have control of where the highlights appeared, and also gave us some nice fall-off of light where we needed it. 

Finally, we brought in another point light source from the back right to focus some spectacular highlights on the meat. Yummm.


Ragout created from leftover rib tips in mocha sauce


Friday, September 20, 2013

Magical Mojitos....


The summer is winding down and we couldn't think of a better way to celebrate one of the last 90 degree days in Chicago than with an ice cold mojito.


Watermelon Mojito - garnished with a watermelon spear and mint leaf


A mojito is potentially a very dangerous drink. If it’s made just right, it tastes so good that you aren’t aware of all the rum inside… until it’s too late. Of course, depending upon your schedule and your plans, a bit of rum may not be the worst thing in the world.

This shot was inspired by what we assumed would be the last 90 degree day in Chicago this year. We went out to lunch, sat outside on a patio, played some bags, and enjoyed some mojitos in mason jars. What a perfect end to the season.

When setting up this shot we wanted to show a cold, refreshing drink to toast the end of a beautiful summer. In lighting, we wanted an outdoor feel so we had to create a sky and a sun. We placed a huge flat high above our set, toward the left side, and shined a large point source through it, with no modifiers on the light. This gave us our sky and the light of a partly cloudy day, but that wasn't enough, we needed some directional light from our sun. So we brought in another point-light source from the back left, a little lower than our sky light. That gave our sun light some direction, and also reflected nicely on the ice in the jar. As you would expect, the shot was very contrasty, so we brought in a white card on the right, very close to our jar, just outside the frame. This card bounced some of that sun’s light back onto the jar and opened up the lighting.

Over all, the lighting was fairly simple and highlighted all aspects that we wanted to accentuate.


Mint Mojito - garnished with a lime and torn mint leaves
We lit this mojito almost exactly the way we lit the watermelon mojito. The difference between these shots was that we dropped the camera angle to show more of the mint inside the jar and brought a soft light from behind to add to our sky light. The addition of the soft light made the scene a bit more flat, as though more clouds had rolled in, making the mojito itself the superhero.

Tuesday, September 17, 2013

Firing Up The Grill...

It's another grilling season and we can't help but take full advantage of it.  Call it a primal instinct, or just football fever settling in for the winter, but something keeps drawing us back to the grill. In fact, year-round grilling has become increasingly popular.


Each of these shots was unique, but they all had the grill in common.  When shooting pics that require a grill, you can do it in a few different ways.  You can shoot on an actual grill, you can fake the grill, or you can photograph when food has come off the grill.  Each of these shots demonstrates one of these options.  

Shooting on the grill is tough, because you have a limited time to get the shot before you have to pull the food off the set, and shoot the next hero.  But with a good team, it can be done without having to worry.    

We touched on how we created the grill shots in a previous post on our blog.  There we went into detail about each step of the process.  So, if you are wondering how we accomplished the fired-up looks, check out our blog post here.

Monday, September 2, 2013

3-Way Grilled Corn on the Cob...

Corn on the cob is a perennial favorite this time of year, and hot off the grill, it’s even better. Grilling corn on the cob changes up this traditional side dish; in fact, most kids don’t even consider grilled corn on the cob a vegetable! When we set up our grill for the upcoming football season, we will definitely have corn on the grill, right along side of the burgers and dogs.


To light this shot, we needed a large unbroken light source to catch all the places the butter had melted. We put a couple of those light sources around the product. One was from the back right and directed toward the left. Beyond that, we had a small point light source from the back left. Even with the soft light sources around the set, we noticed a bit too much contrast, so we put a white card up, over the top of the set, to reflect some of the light back down and fill in the shadows.

Butter is a challenge. The butter started to melt instantly, so we had to move fast. Needless to say, we had to melt the butter a few times to get the effect we were looking for.

Wednesday, August 28, 2013

Mushroom Ravioli...

Making your own ravioli isn’t a job for beginners, but the taste is well worth the effort.

You can see how this shot developed in the "how we did it" photos below.
Once the pasta is created, you can craft the stuffing – cheese, spinach and meat are all fine options, but mushrooms are the pièce de résistance. Don’t bother with a marinara or Arrabriata sauce for this recipe. A basic garlic and oil sauce, aglio olio in Italian, with a winning combination of fresh basil and chopped walnuts, topped with crushed red pepper, shows off the shape of the pasta and complements the mushroom flavor without overtaking it.

Lighting the set was fairly simple. We created a window-lit setting, by placing a large, soft light source on the right, slightly to the back. This light accentuated the beautiful highlights on the sauce that coated each square of pasta. Since the light was relatively close, the inverse square law (the power of the light will be inversely proportional to the square of the distance) was making the left side of the plate darker than we wanted. We brought in a small white card to bounce the light back and fill in the shadows.  At this point, the ravioli appeared somewhat flat and needed a enhancement.  From the back left, we brought in a small point source light to catch the rim of the pasta and add the ‘punch’ we were seeking.

The Stand-in:

Click to Expand


Monday, August 5, 2013

Lamb Chops....

Our client requested both a searing on-grill shot and an impressive plated shot of single rib portions. We started with a full rack of lamb and our food stylist, Janet Middleton, cut the rack into chops. 


Fired-Up Lamb Chops.

The concept was to create an outdoor shot, but keep the control afforded by our indoor studio. We rigged up a stationary grill top, and used a long lens (150mm) to come in close on the food. This accomplished a few key points: 1. We could capture the nicely charred look of the meat and juicy accents. 2. We didn't need to use an actual grill in the studio; using a real grill limited our lighting freedom and perspective. 3. We would have had a large black rim surrounding the food and a very shallow bowl for the coals; we also didn't want it to look like the grill grate was resting right on the coals.


In our set up, we had a huge bed of coals farther under the set, allowing us to use our lights to illuminate them, without affecting our food/set high above it. Creating the appearance of a grill also allowed us to have our light sources unimpeded by the black rim of most grills and we were free to light 360 degrees around the food. We had numerous lighting sources. Again, we wanted to create an outdoor feel, so we had to recreate the sun as well as the sky. We put a very large broad source above the set to emulate the sky and control our shadows and contrast. We then positioned a point source coming from the front right to represent our sun. A meat shot really benefits from specific highlights, so we brought in a "meat light." This is a very small point source light, which we placed behind the meat, to highlight the juiciness and detail on top of the meat. Since our coals and fire were too low to cast any real light from the underside of the grate, we put a point light source under the food as well, to simulate the fire. We also focused a light on the coals, so they would be appropriately lit.


We wanted to show the chops at their tender peak of perfection, so Janet cooked the lamb quickly and achieved well-defined grill marks. We timed the shots beautifully and even caught detailed herb and seasoning particles intact on the surface of the perfectly grilled meat for the plated shot.

Friday, June 21, 2013

The Moist and Tasty Pork Chop....

Nothing says summer, like grillin'...


A griller's choice and challenge,


     An outdoor feel was a must for this summery shot. To keep control, but still have the natural light look from an afternoon sky, we placed a point light source to come from the back right. This light gave us direction and also produced all the specular highlights on the chop.

By doing this, our indoor set became a realistic afternoon sky with a controlled, simulated sun. To create the look of a natural light, you can't just create a sun, you also have to create a sky. We put a large white flat behind the set and wrapping around towards the left, thus creating a sky-like impression and producing a large, unbroken highlight on the sauce. Since the front was going a little dark, we filled in with a mirror to light the front and captured the delectable details of both the meat and potatoes. 

The shoot was fun, fragrant and we all spent a lot of time licking our lips.


Monday, June 17, 2013

White BBQ Pulled Chicken Pizza...

Pizza comes many different ways.  Size, shape, layering, are all something that are different depending on where you are in the country.

A unique White BBQ sauce accents this wonderful pizza.
Chicagoans traditionally think pizza is thick, hearty and the sauce goes on top.  Other Chicagoans think pizza should be on a thin cracker like crust.  This particular recipe is a lot lighter and had more of a crisp taste to it, thus we wanted to keep the crust thin.

The product has a lot going on with it, so we wanted to keep everything else simple and clean.  Our client had this wonderfully weathered pizza stone, and it was an obvious choice when propping to use it.   We had a very large soft light source coming in from the right, to give us our main light direction.  We also had a soft light source coming from directly behind to help give some incidence on the surface and parts of the pizza that have a sheen.

To add some interest, we put a glass shower block on the surface to play with the soft light.  That glass block is giving us the white incidence on the back right of the frame.  The left side of the fame then got empty and dark, so we put a small measuring cup of parmesan cheese to break up that negative space.  We didn't want our shot to be completely flat with soft light, so we brought in a point source from the back left to punch up the contrast and make the shot come alive.

The front of the shot was going darker than we would have liked, so we put a white card on the front left to reflect some of our main light coming from the right, then used a hand held mirror on the front right to reflect the point source light back onto a desired part of the product.


Wednesday, May 29, 2013

Maker's Mark...

Patience now a days is a thought of as a thing of the past.  Everyone wants instant, now and later can't wait.  Some things demand patience and if you can wait, some of the best things life has to offer will be waiting.  About 6 years of waiting will give you Maker's Mark Whiskey...

Again Brian and Ryan had one of those days where they decided to shoot a very similar project.  This project was a bottle of whiskey.  They again separated and did their respective shots.

Brian's Shot
Brian set up a window frame behind the set and created an over exposed, soft light  coming through.  This helped give a great natural look and feel to the photograph.  To fill the photo so it wasn't just back lit, he brought in a soft box on a boom from high left, and a white card on the right to reflect some of the light back onto the bottle.

Ryan's Shot
Ryan decided to keep this shot clean.  "The whiskey sells it's self" was the approach he wanted to take. This shot was also very simplistic in its approach.  He put the bottle and the glass on a very small white pedestal to get them up off a surface.  This allowed for the highlights to run top to bottom with out a break.  A smoked plexiglass was put behind the bottle, and a large point source with a grid was used to get gradations in the liquid.  A large soft light source was positioned very close to the bottle on the left side, which gave a solid highlight.  On the right, a white card to reflect that light, and to also act as a light source.  A small point source was aimed at the top of the card which gave a subtle highlight on the top right of the bottle.


Monday, April 29, 2013

Creamy Pesto with Asparagus over Pasta...

Some people say they don't like too much green food, or even not at all.  Those people have no idea what they are missing.

Pasta and a homemade pesto, topped with shredded parmesan cheese.

This shot was shot for a client.  They really wanted to feature the food, and they realized that with all the pasta, it could get confusing what was going on.  We decided to come in tight and really focus on the heart of the dish.  The propping was all done by our art director who did a fantastic job of splashing the right colors together to feature the pesto.

To light this shot, it was actually very simple.  Our main light was a very large soft light source from the right side.  We wanted to give the natural light looks, so we didn't over light it.  We then put in a small white card close to left side of the bowl, which really filled in the dark holes created by our "sun".  Then to give it just a little bit of pop, we gave it a point light source from the back left.  The food stylist did a great job of keeping this very simple and elegant.  Food styling wise, this shot could have been a nightmare if the stylist wasn't careful.  Pasta can be very difficult to style properly.


Tuesday, March 26, 2013

Fresh Fluffy Doughnuts...

Homemade doughnuts are amazingly tender and delicious.  The dough itself isn't terribly sweet, so the coating of sugar doesn't make them cloying at all.  A mix of cinnamon and sugar or your favorite frosting would be just as delicious.

These are traditionally a cold weather food, but since its near April in Chicago and still 20 degrees, why not?

These small doughnuts were made for a client, but we shot them separately to get a different perspective.  We just had to come in close and tight on them to show off the cinnamon and sugar.  They were still hot enough that putting them in set, we were a little worried they would crumble apart.  To really show off the texture and to give a clear idea of how much coating is on these doughnuts, we used just a few point source lights.  One from high and to the back right, to skim across the face of the 2 forward facing heroes.  The other was low and to the back left to skim and give an edge light to some others.  In addition to that, we had a soft light overhead to control contrast.  We spilled a little bit the topping onto the surface, and put some empty glass ware behind to give some extra interest.

All and all, this was a very simple shot made delicious by the food itself.  Sometimes, the photographer and food stylist have to work some magic, but simple is sometimes better.


Wednesday, March 20, 2013

Ricotta Crepes with Smoked Salmon....

Of all the things that France has done for the world, is there anything more satisfying than the Crepe?  It forms so perfectly to fit just the right ingredients to make a perfect breakfast. Or any meal for that matter.

Ricotta cheese provides an unexpected tenderness to smoked Salmon-filled Crepes.
A meal that needs to be fresh, we wanted everything about this photo to express that feeling.  The Art Director and Client were here for this shoot, and we all had the same idea of natural light.  So to keep things consistent, we created the natural light by using a combination of soft light and point sources.

But before we could start lighting the food, we had to pick our surface and props.  We started this shot by trying to arrange different props and surfaces, but ultimately everything seemed to take away from the hero of the shot, the salmon.  So we kept everything very subtle and minimal.  This really helped the color of the salmon explode in the photo.

Friday, March 15, 2013

The Aroma of Steak...

The power of smell is amazing.  We shoot a lot of food in our studio, but nothing has the ability to gravitate people to a set more than a fresh steak.  The smell fills the studio, and everyone wants to try it.

A savory mushroom crust surrounds tender beef filets in this recipe, aside from the red wine reduction.

This Shot is just one from a 2 week shoot with this client.  The shoot was for a cookbook for the client, and should be ready to purchase in the next few months.  I shot this with our Sinar Digital back mounted on a 4x5 view camera.  I wanted to get low and really close on the subject, to really show the   "meat" of the shot. (pun intended)  I used a 150mm lens, wide open. 

For lighting, the client and art director wanted to portray a more natural light.  In my mind, I envisioned the window coming from the right.  So to create that light source I used an 11'' Speedotron bare reflector and aimed it at a bank of white cards.  This gave me a very large soft light source, which gave me the beautiful highlight on the right portion of the filet.  I then brought a small white card close and on the left, to reflect that light and fill in the left side.  That card is giving a small highlight on the front left side of the filet.  The shot also needed some directional light, so I brought in a few point sources. 

One was from the back left, which gave some nice specular highlights, and really made crust separate.  Another was directly behind; this was a small point source with very low power, and it is providing the rim lights for the green beans.  At this point the overall contrast of the shot was too much, and the Red Wine Reduction on the plate wasn't getting any light, so I put a softbox on a boom overhead.  This filled in some of the shadows and reduced the overall contrast.